
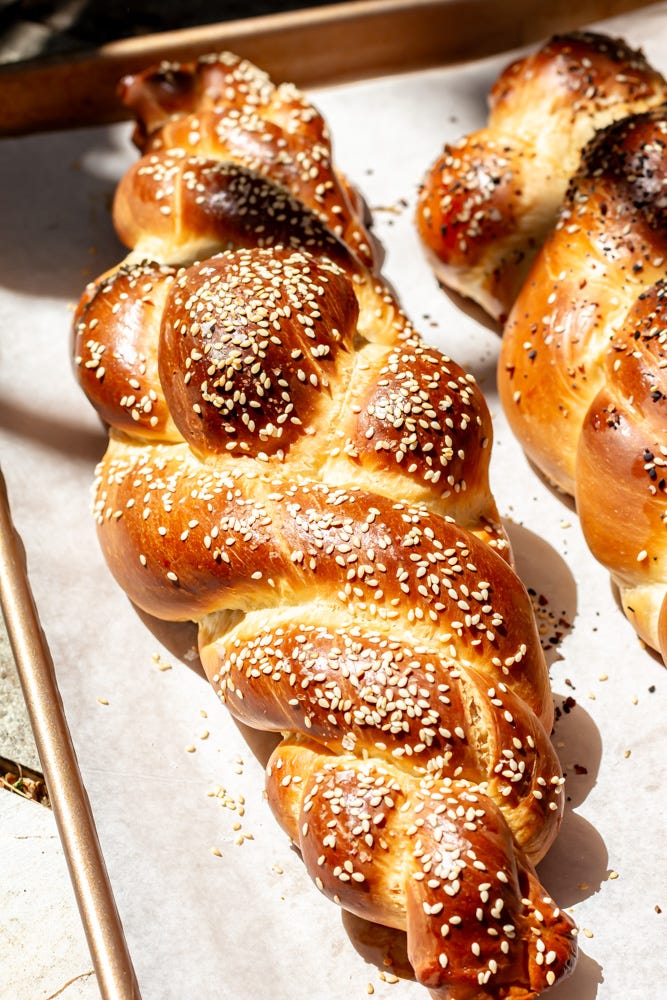
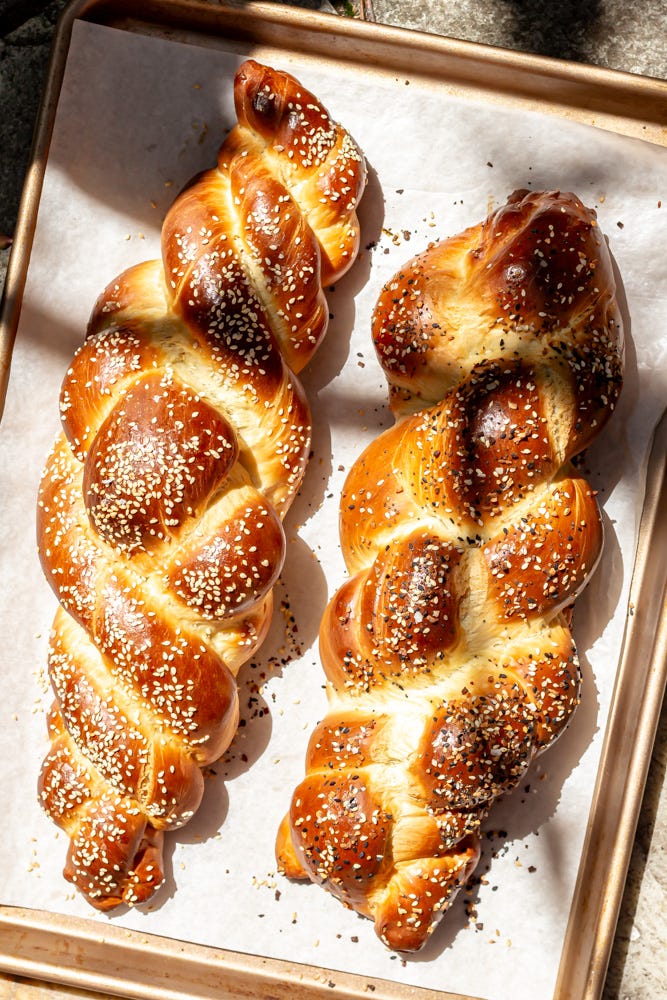
Buttermilk Challah
rediscovering my love for an old recipe

About five years ago, I went on a challah kick. I had made it a couple times before in pastry school and at the restaurant, but I vividly remember seeing a photo in Adeena Sussman’s book Sababa for a glossy, eggy challah loaf filled with feta and za’atar and decided, right there in the cookbook section of Barnes and Noble, that I would be spending the next month making challah. I made Adeena’s version and researched a bunch of different recipes from some of my favorite bakers and recipe writers, played with egg to oil to water ratios, and tried out different mixing techniques until I was pretty sure that I’d created my favorite challah recipe.
Then, about a month later, I was back in Knoxville for a visit and I had a loaf of challah made by my pastry chef mentor and friend, Laurence Faber (who now owns the semi-famous restaurant Potchke Deli). Turns out, mine was good, but his was perfect. Laurence, whose specialty is blending his Jewish and Southern roots in food, told me that his secret was buttermilk. Like any good Southern cook knows, buttermilk makes everything tangier and more tender.
I took Laurence’s notes home to my favorite challah recipe, subbing out the water for thick, creamy buttermilk and I’ve been making it this way ever since.

It had been a few years since I’d made a batch of challah—I was busy baking focaccia and sourdough and tarts and cakes and then a baby, but lately, Marco has been joining me in the kitchen and I thought challah might be a perfect project for us. He climbs up on his little stool, giddy to be part of the action, and we’ve been baking together—cookies, snack cakes, and now, bread. Does he mostly eat fruit, turn the light switch on and off, and fling flour across the counter tops? Absolutely. But I cannot describe how fun it is to share something with him that I love so much.
and in case you’re interested, I’ve discovered a few things that have made baking with a toddler a little less chaotic…
Prep everything before, if possible! Especially for recipes with lots of ingredients, I’ve found that if I’m able to measure everything out before he joins in, things go a bit smoother. It’s much easier for him to pour things out of deli containers and into mixing bowls and I’m less likely to make mistakes since I’m not as distracted while measuring.
Provide snacks! When I know we’re going to be baking, I’ll leave a piece of fruit out in Marco’s little work space for him to snack on while we work. Snacks always help and it keeps his hands busy when there is a portion of the recipe that he isn’t quite yet able to participate in. This also keeps him from shoving raw dough into his mouth.
Relax! As a bit of a control freak/perfectionist/all-around kind of bossy lady, it’s taken me consciously remembering that not everything has to be done just so. Baking with Marco helps me remember that baking is fun and if our cookies are misshapen or our bread is lumpy, it’s okay!
buttermilk challah
makes 2 loaves
Ingredients:
400 g (3 cups) all purpose flour, plus more for the work surface
280 g (2 cups) bread flour
285 g (1 1/4 cups) buttermilk, slightly warmed
2 tsp active dry yeast
2 whole eggs
1 egg yolk
110 g (1/3 cup) honey
90 g (1/2 cup) oil (like avocado, grapeseed, sunflower, or olive)
1 tbsp kosher salt
egg wash
optional: sesame seeds, everything bagel seasoning, flaky salt, etc for topping
Procedure:
In a large mixing bowl, combine 1/2 cup of the buttermilk and the yeast. Stir and let rest for about 5 minutes, until foamy.
When yeast is ready, add eggs, egg yolk, honey, oil, and the rest of the buttermilk. Whisk to combine.
Add all purpose flour, bread flour, and salt to the bowl and use a wooden spoon or a rubber spatula to stir until all of the flour has been moistened and a shaggy dough begins to form.
Turn dough onto lightly floured work surface and then sprinkle the top of the dough with a little more flour. Knead dough on the countertop for 3-5 minutes, until smooth and the dough passes the window pane test.
Wipe a small amount of oil around a large bowl. Place the dough into the bowl, cover with plastic wrap and let proof for 1-1 1/2 hours, until the dough is doubled in size.
When proofed, punch the dough down and turn onto a lightly floured work surface. Use a bench scraper and a kitchen scale to divide the dough into eight equal pieces. Shape dough into small rounds, cover with plastic wrap and let rest for 20 minutes.
Shape each dough round into a rope, about 8” in length. You should now have eight ropes, four for each challah loaf.
These are the instructions for shaping a four-strand challah braid. If you want to do a three or five strand braid, just divide your dough into the appropriate number of pieces. Shape the challah loaves: I started to type out all of the steps for braiding, but I find that it is SO MUCH EASIER to watch a video that shows exactly where each strand should go. Here’s a great one that I’ve used often.
Place braided challah loaves on a parchment lined baking sheet. Cover with plastic wrap and let rise for another 30-45 minutes.
When there is 10 minutes left in the final proofing time, preheat the oven to 375°F. Brush the tops of the challah with egg wash and sprinkle with salt, sesame seeds, za’atar, etc.
Bake for 20 minutes, rotate the pans, and bake for another 15 minutes until challah is deeply golden brown.